We’ve all been there—that annoying pool of water that seems to have taken permanent residence in your driveway or yard. Fortunately, the solution to your watery woes is a trench drain, and we’re here to walk you through the installation process step by step. Prepare to bid farewell to that pesky puddle and welcome a new era of drainage efficiency. Ready? Let’s dive in!
Step 1: Dig and Prepare the Trench
Channel your inner archaeologist and grab your shovel—it’s time to dig! Start by marking the perimeter of your future trench drain with stakes and string. Then, excavate a trench slightly broader and deeper than the drain channel you plan to install. Remember, Rome wasn’t built in a day (nor was your trench), so take your time and ensure the trench is as level as possible.
Step 2: Locate the Catch Basin
Now that you’ve got your trench, it’s time to find a suitable home for the catch basin. This is the unsung hero of your trench drain system—its job is to collect water and channel it away from your property. Choose a location downhill from the trench and dig a hole large enough to accommodate the basin. Remember, you want the water to flow away from your property, so ensure the catch basin is installed at a lower elevation than the drain channel.
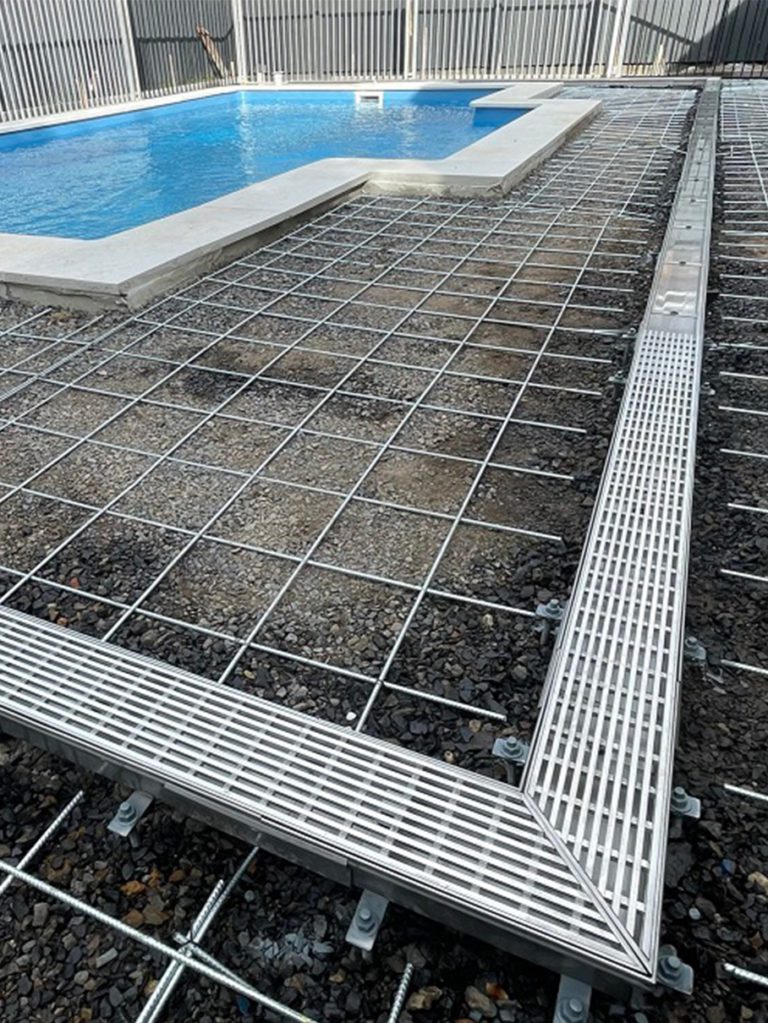
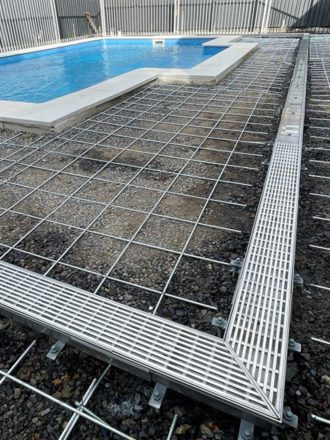
Step 3: Begin Laying Out the Drain Channel
This is where the puzzle-solving skills you honed as a child come into play. Start by assembling the drain channel pieces, connecting them end-to-end, and laying them out along your freshly dug trench. Don’t worry if they don’t fit perfectly at first—you can always trim the last piece to ensure a snug fit. Channel your inner perfectionist and ensure the drain pieces are aligned and level.
Step 4: Determine the Appropriate Channel Height
Once the drain channel is in place, it’s time to fine-tune the height. Ideally, the channel’s top should be flush with the surrounding ground level to ensure optimal water removal. To achieve this, place a straight edge (such as a 2×4 piece of wood) across the top of the trench and measure the distance between the bottom of the straight edge and the top of the channel. Adjust the height accordingly by adding or removing soil beneath the channel.
Step 5: Backfill the Trench with Concrete
Now that your drain channel is sitting pretty, securing it with concrete is time. Mix the concrete according to the manufacturer’s instructions and pour it into the trench surrounding the drain channel. Use a trowel to smooth the concrete, ensuring it’s level with the surrounding ground. Pat yourself on the back—you’re almost done!
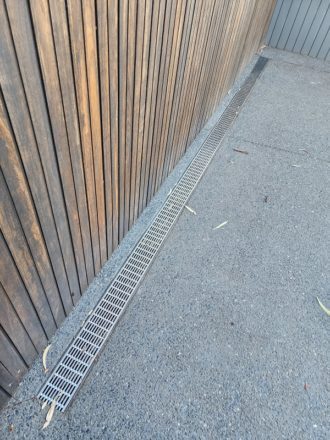
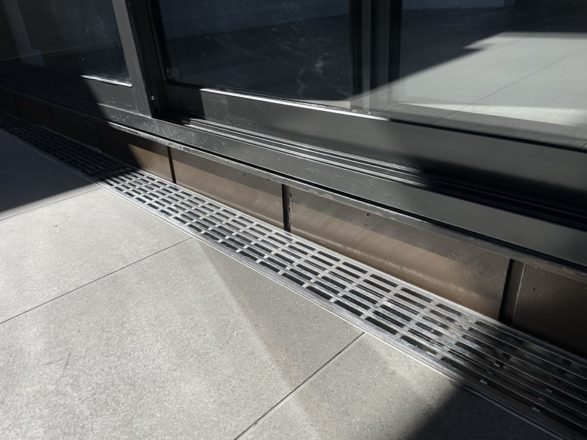
Step 6: Remove the Tape
As tempting as it may be to admire your handiwork, give the concrete some time to cure (usually around 24 hours, depending on the manufacturer’s instructions). Once the concrete has hardened, carefully remove the tape from the drain channel to reveal the glorious finished product. Congratulations, you’ve just installed a trench drain!
The Bottom Line
The trench drain installation tango is a dance of dedication, precision, and drainage. With these steps, you’ve mastered the art of water management and can be confident that your property is ready for even the most torrential downpours.
At Yeti Civil Products, we are dedicated to providing our customers with the best in grate drainage solutions. With our extensive range of products, customization services, and commitment to quality, you can trust us to deliver the perfect drainage solution for your project, whether it is an industrial facility or a residential property.